Kgolive
New member
- Joined
- Sep 18, 2025
- Messages
- 11
- Reaction score
- 5
8-9 week lead time before I received them. Cali Raised emailed me about 6 weeks after ordering to ask me if I have threaded holes on my frame to mount them. Apparently some of the new 4Runners don’t have pre threaded holes on the frame. I checked and I only have two threaded holes on the frame on each side on the bottom of the frame rails. Cali Raised said no problem they have a solution they will be providing. The solution is similar hardware to what Westcott designs uses on theirs. Fast forward to today, install day.
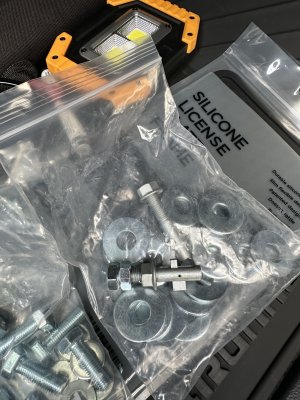
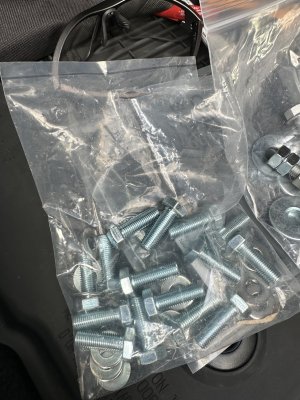
I received two bags of hardware. One bag of bolts and washers for pre threaded holes, another bag of anchoring bolts and washers. It also included a card with a QR code to scan for a video tutorial on how to install them with the included hardware for frames with pre threaded holes. This didn’t apply to me but fortunately Westcott Designs has a YouTube video explaining how to use the supplied anchoring bolts solution. How hard can this be?
Upon installing the driver side slider I learned none of the supplied threaded bolts will thread into the few (2 on each side) pre threaded holes I have on my frame.
No big deal, I can go to Ace for a couple of bolts right? I’ll get to that shortly.
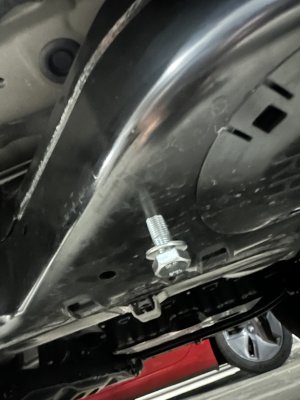
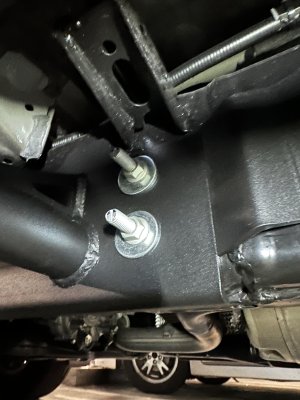
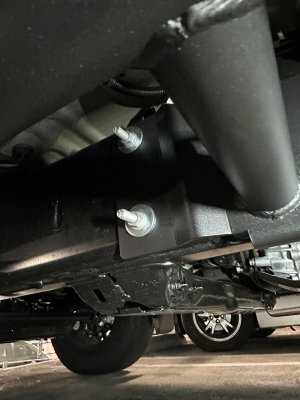
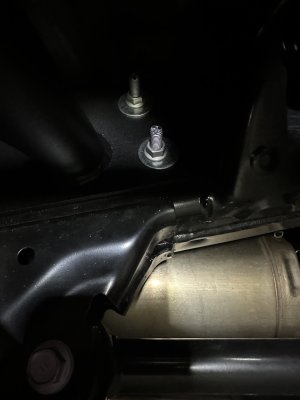
On to the anchoring bolts. I used a sharpie to mark the top side so I knew which way the bolt needs to be positioned for it to remain locked in place. You need a flat head screwdriver to turn it. Since the mounting locations are so high on the frame I had to use a very short flat head screwdriver. Even then I cannot supply enough torque with it to prevent the stud from wanting to turn as I tighten down the nut. I believe this can be remedied by threading two nuts onto the end of the stud and using a wrench to hold the inner nut in place while you tighten the nut against the frame. Maybe this isn’t necessary at all? Maybe once the nut is fairly tight against the frame, it’s ok for the stud to turn because the inner locking mechanism can’t retract under force? I don’t know because there’s no instructions or explanation.
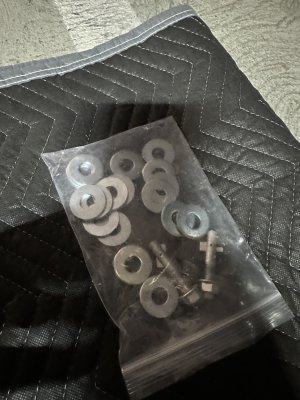
After installing the anchoring bolts on the drivers side I realized they only supplied me with 8 and it would take 12 to do both sides. They gave me maybe 24 washers though. I don’t know why. Am I supposed to double them up? Let me check the install video. Oh wait…
So I’m left with only the drivers side slider semi mounted and not fully tightened until I figure out the proper way to tighten the locking nuts on the anchoring bolts to the frame.
I sent an email to Cali Raised doing my best to describe the issues I’ve run into and lack of proper hardware. I will await their response. I haven’t seen anyone else post about these so either no one else has ran into this problem or I am the only one to post about it.
Thoughts? Am I missing something?
Oh and went to Ace for bolts to go into the threaded holes and couldn’t find a match. So I’m at a loss with what size or thread pitch it requires. The supplied m10 fine thread bolts don’t work and course thread didn’t either.
I received two bags of hardware. One bag of bolts and washers for pre threaded holes, another bag of anchoring bolts and washers. It also included a card with a QR code to scan for a video tutorial on how to install them with the included hardware for frames with pre threaded holes. This didn’t apply to me but fortunately Westcott Designs has a YouTube video explaining how to use the supplied anchoring bolts solution. How hard can this be?
Upon installing the driver side slider I learned none of the supplied threaded bolts will thread into the few (2 on each side) pre threaded holes I have on my frame.
No big deal, I can go to Ace for a couple of bolts right? I’ll get to that shortly.
On to the anchoring bolts. I used a sharpie to mark the top side so I knew which way the bolt needs to be positioned for it to remain locked in place. You need a flat head screwdriver to turn it. Since the mounting locations are so high on the frame I had to use a very short flat head screwdriver. Even then I cannot supply enough torque with it to prevent the stud from wanting to turn as I tighten down the nut. I believe this can be remedied by threading two nuts onto the end of the stud and using a wrench to hold the inner nut in place while you tighten the nut against the frame. Maybe this isn’t necessary at all? Maybe once the nut is fairly tight against the frame, it’s ok for the stud to turn because the inner locking mechanism can’t retract under force? I don’t know because there’s no instructions or explanation.
After installing the anchoring bolts on the drivers side I realized they only supplied me with 8 and it would take 12 to do both sides. They gave me maybe 24 washers though. I don’t know why. Am I supposed to double them up? Let me check the install video. Oh wait…
So I’m left with only the drivers side slider semi mounted and not fully tightened until I figure out the proper way to tighten the locking nuts on the anchoring bolts to the frame.
I sent an email to Cali Raised doing my best to describe the issues I’ve run into and lack of proper hardware. I will await their response. I haven’t seen anyone else post about these so either no one else has ran into this problem or I am the only one to post about it.
Thoughts? Am I missing something?
Oh and went to Ace for bolts to go into the threaded holes and couldn’t find a match. So I’m at a loss with what size or thread pitch it requires. The supplied m10 fine thread bolts don’t work and course thread didn’t either.