kophoto4x4
Active member
- Joined
- Mar 26, 2025
- Messages
- 118
- Reaction score
- 98
Upgrading the intercooler on the 6th-gen 4Runner is one of the best mods you can do if you’re planning to add power, tow more, or just want more consistent performance in hot conditions. The SXTH Element Intercooler is a direct-fit upgrade designed to improve charge-air cooling, reduce heat soak, and support future mods. This guide walks through the full installation process step-by-step.

 4runnermods.com
Vehicle & Product Info

Step 1: Prep the Vehicle

Step 2: Remove Front Bumper & Trim

Step 3: Remove parts to Access the Intercooler


Step 4: Remove Factory Intercooler


Step 5: Prep the SXTH Element Intercooler

Step 7: Reinstall Front Bumper & Trim
Take your time here—misaligned clips are the most common issue.
Step 8: Final Checks
Results & Impressions
The SXTH Element Intercooler offers:
Final Thoughts
If you’re building your 6th gen 4Runner for performance, towing, or long-term reliability, this intercooler upgrade is a no-brainer. The fitment is excellent, install is straightforward, and the gains are real.
If you’re comfortable turning a wrench, this is a solid DIY afternoon project that pays off immediately.
If you want a little more in depth you can check out the video install of this on my channel.
Pre Order | 2025+ Toyota 4Runner Front-Mount Intercooler
Upgrade with our 2024+ Tacoma, 4Runner, and Land Cruiser LC250 Front-Mount Intercooler for better cooling, power, and reliability on and off-road - SXTH Element
4runnermods.com
Vehicle & Product Info
- Vehicle: 2025 Toyota 4Runner (6th Gen, Turbo)
- Intercooler: SXTH Element Intercooler by SXTH Element Engineering
- Install Difficulty: Moderate (DIY friendly)
- Estimated Time: 2–3 hours
- Tools Needed: Basic hand tools
Step 1: Prep the Vehicle
- Park the 4Runner on a level surface.
- Let the engine cool completely.
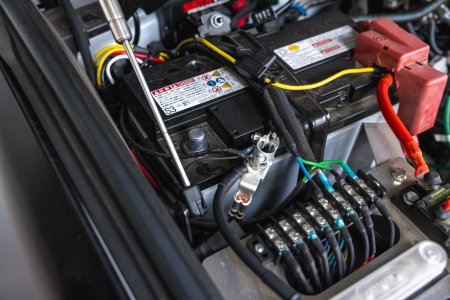
- Disconnect the negative battery terminal for safety.
Step 2: Remove Front Bumper & Trim
- Remove the plastic radiator cover using a trim tool.
- Remove bolts and clips securing:
- Upper grille
- Air dam if you still have it
- Fender liner fasteners near the bumper edges
- Carefully pull the front bumper forward and disconnect 3 sensors on the top.
- Set the bumper aside on a soft surface
- Remove your airbox.
Step 3: Remove parts to Access the Intercooler
- Remove plastic pieces with 4 clips and pulling it out off of the frame.
- Remove both horns.
- Remove the 4 bolts holding the hood latch on with one hiding in the back.
- Remove the bracket holding on the compressor lines
- Lastly remove the top metal bar help on by 4 14mm bolts
Step 4: Remove Factory Intercooler
- Loosen the charge pipe clamps on both the inlet and outlet sides.
- Remove air sensor and be very carful with it. 17mm Socket. Keep track of copper washer.
- Carefully slide the hoses off the intercooler.
- Remove the two hoses on the passenger side using pliers to undo clamps.
- Use some bungee cords to hold the entire assembly up.
- Unbolt all 6 bolts holding the radiator on.
- Pull the radiator off and let it hang.
- Remove the mounting bolts securing the intercooler to the vehicle.
- Slide the intercooler out and set it aside.
Step 5: Prep the SXTH Element Intercooler
- Compare the SXTH intercooler to the factory unit to confirm orientation.
- Transfer the 2 factory rubber isolators.
- Position the SXTH intercooler into place.
- Install mounting bolts and tighten them snug.
- Install all 6 bolts that hold radiator on and torque to 15 ftlbs and use some blue loctite.
- Reconnect the charge pipes and ensure they’re fully seated.
- Tighten all clamps evenly and securely.
- Torque the mounting bolts to factory specifications (or SXTH’s recommended torque values if provided).
Step 7: Reinstall Front Bumper & Trim
- Reconnect any sensors or lighting harnesses.
- Install air sensor with copper washer and torque to 15ftlb do not over tighten.
- Reinstall the bumper, ensuring all clips align properly.
- Reinstall:
- Fender liner fasteners
- Splash shield
- Upper grille
- Radiator cover
Take your time here—misaligned clips are the most common issue.
Step 8: Final Checks
- Reconnect the negative battery terminal.
- Start the vehicle and let it idle.
- Check for:
- Boost leaks
- Whistling sounds
- Loose clamps
Results & Impressions
The SXTH Element Intercooler offers:
- Lower intake air temps
- Reduced heat soak
- More consistent power delivery
- Better support for future mods like intakes and tuning
Final Thoughts
If you’re building your 6th gen 4Runner for performance, towing, or long-term reliability, this intercooler upgrade is a no-brainer. The fitment is excellent, install is straightforward, and the gains are real.
If you’re comfortable turning a wrench, this is a solid DIY afternoon project that pays off immediately.
If you want a little more in depth you can check out the video install of this on my channel.
Attachments

Last edited by a moderator: